
Processing Withdrawal Cases
Please note: This article summarises legal requirements for orientation purposes only. It is not legal advice. If you need advice on your individual obligations, we recommend consulting a lawyer.
Where you find withdrawal cases
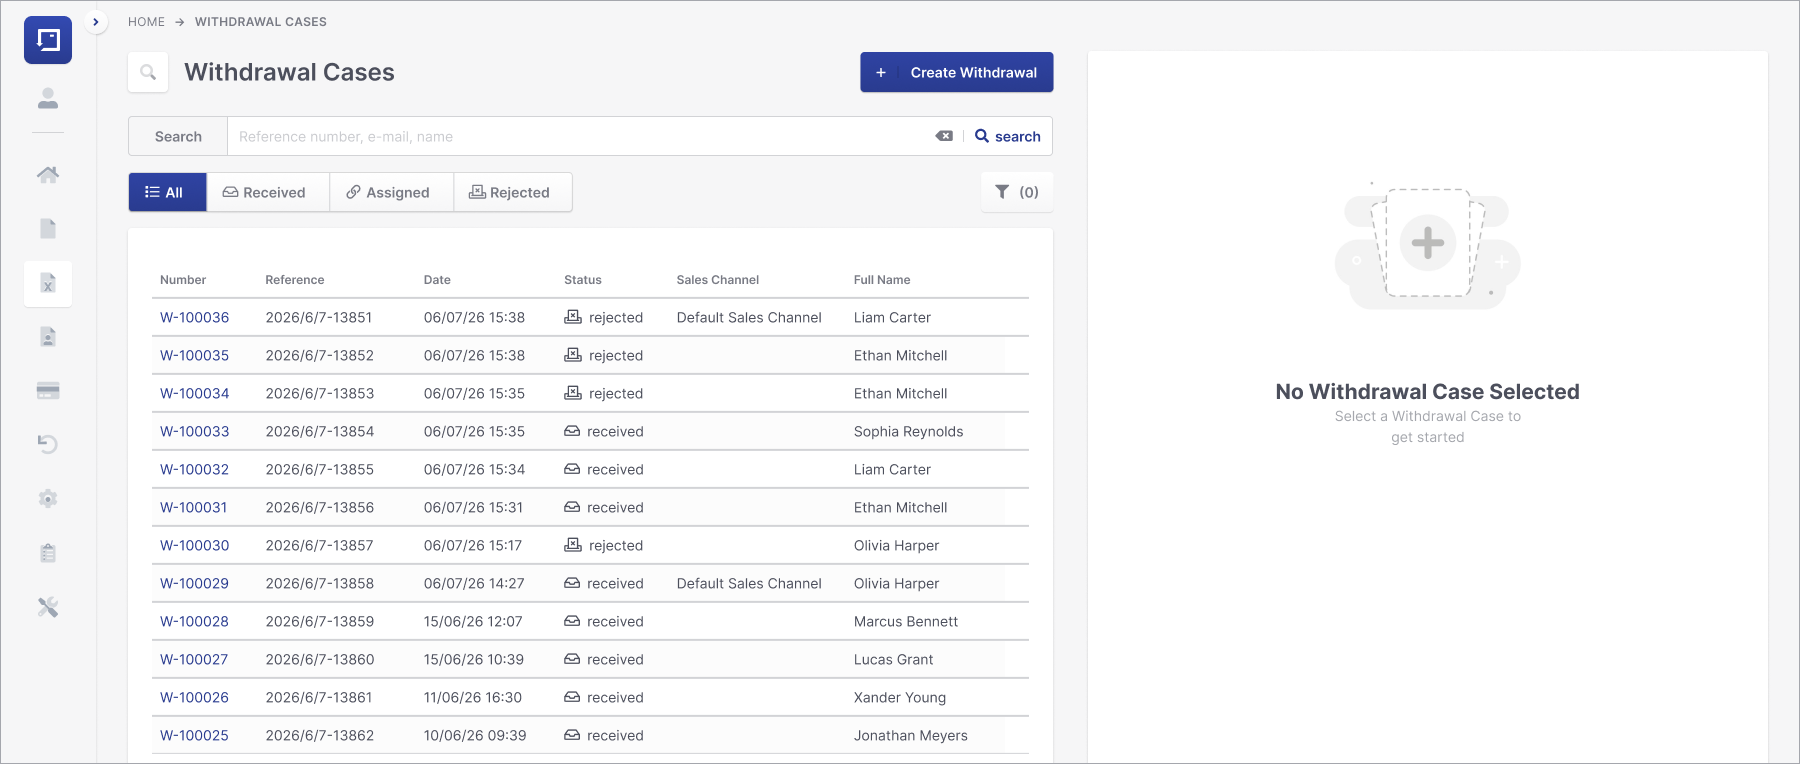
Withdrawal cases have their own section in the Management Portal. In addition, the dashboard highlights cases that could not be matched to an order automatically, so your team sees at a glance where manual work is waiting.

Why speed matters: The withdrawal is legally effective the moment the customer confirms it in the widget, not when your team processes the case. Timely processing is therefore an operational task (refunds, stopping shipments, informing the consumer), not a legal prerequisite for the withdrawal itself.
The case list
The case list shows all withdrawal cases of your instance with filter and search options, for example by status, widget, date or reference. Open a case to see all details: the declaration data submitted by the customer, the matched order (if any), the emails sent, and the complete history.
The status model
A withdrawal case is always in exactly one of these statuses:
- received: The withdrawal has been submitted and confirmed by the customer, but is not yet matched to an order. Cases in this status form the manual queue.
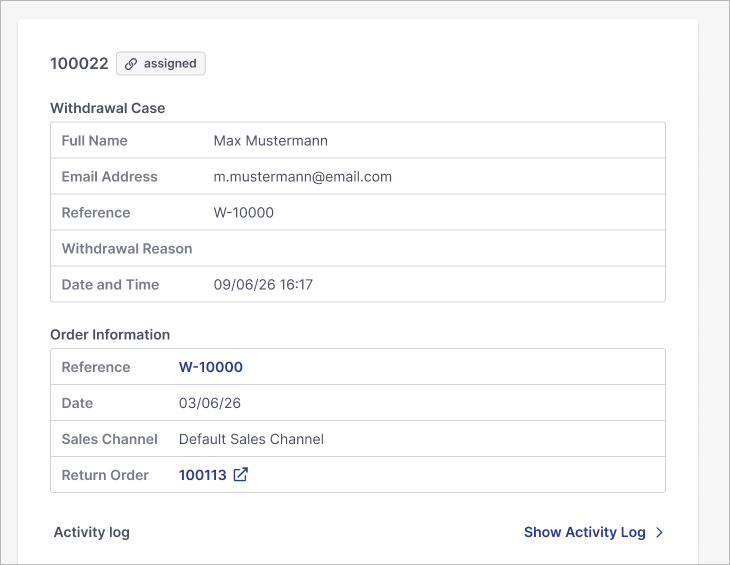
- assigned: The case is matched to an order, either automatically or manually by your team.
- rejected: The case was rejected, either automatically (duplicate, period expired) or manually with a documented reason.
- completed: The case has been fully processed, including the follow-up return process where applicable.
Automatic matching and auto-rejection
When a customer submits a withdrawal, returns.cloud tries to match the submitted reference and email address to an order. The matching considers all reference fields configured for the widget, for example the order number and the invoice number, so the customer does not need to know which of their document numbers is "the right one". See "Setting up a Withdrawal Widget" for the configuration.
The possible outcomes:
- Match found and within the withdrawal period: The case is set to assigned automatically. No manual work is needed.
- Match found but period expired: The case is rejected automatically with the reason "period expired". The deadline is calculated from the verified, item-level delivery date; for multi-parcel orders the period starts with the last delivered item. A case is never auto-rejected on the basis of a guessed date. See "Introduction to Withdrawal Management" for details.
- Duplicate: If a withdrawal for the same reference and email combination already exists, the new submission is rejected automatically with the reason "duplicate".
- No match found: The case stays in status received and appears in the manual queue.
In every automatic decision, the customer is informed by email. See "Email Communication and Templates".
Working the manual queue
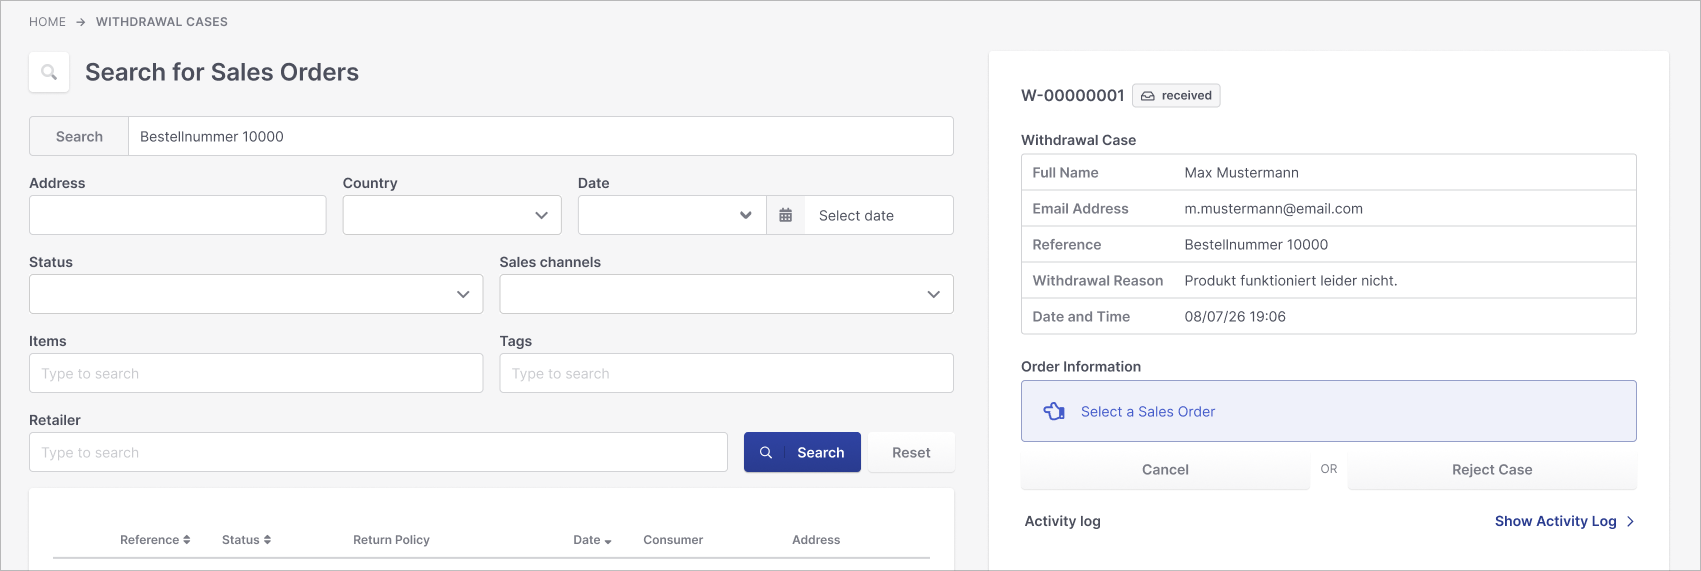
Cases in status received need a human decision. Open the case and choose one of two actions:
Assign to an order
Search for the correct order (for example by name, email, or alternative references such as the invoice number) and assign the case. The customer receives the assignment confirmation email, and the case moves to assigned.
Typical situations: the customer made a typo in the reference, used an email address different from the one in the order, or entered a reference that is not among the fields configured for auto-matching. Note that entering the invoice number instead of the order number does not create manual work if the invoice number is configured as a reference field for the widget.
Reject the case
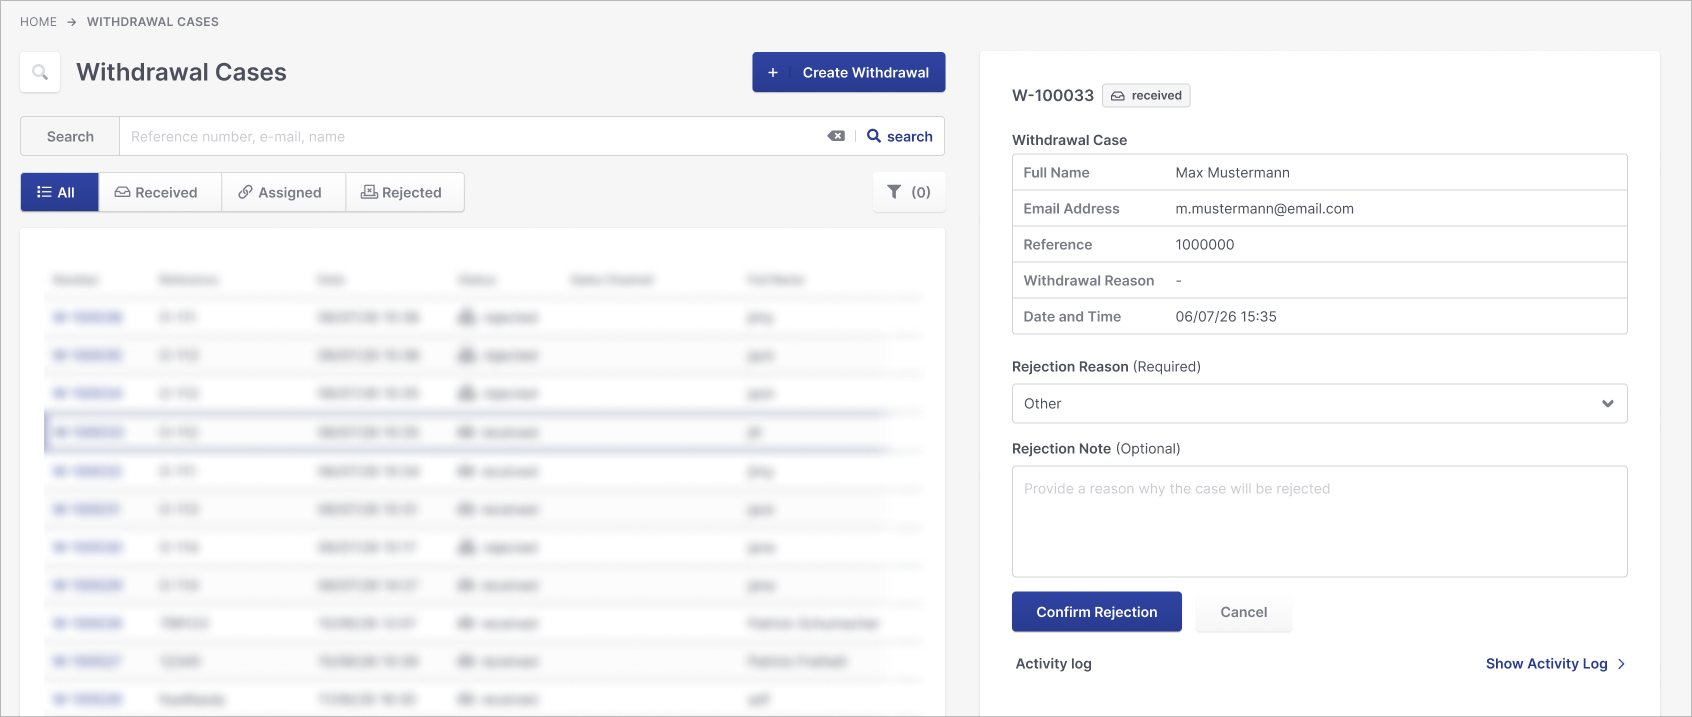
If no matching order exists or the withdrawal cannot be accepted, reject the case. The rejection dialog asks for:
- A rejection reason from the reason catalogue. The reason controls the dynamic text in the rejection email to the customer.
- An optional internal note, which is stored in the case history for documentation.
For the frequent situation that no order can be found at all, use the shortcut "Reject - no matching order" directly from the case.
Important: Rejecting a case documents your operational decision. It does not by itself decide the legal validity of the withdrawal in a dispute. If a customer objects to a rejection, involve your customer service and, where necessary, your legal counsel.
Creating a case manually
Customers keep the right to declare a withdrawal through any channel, for example by phone, email or letter. The widget is an additional, mandatory option, not the only one.
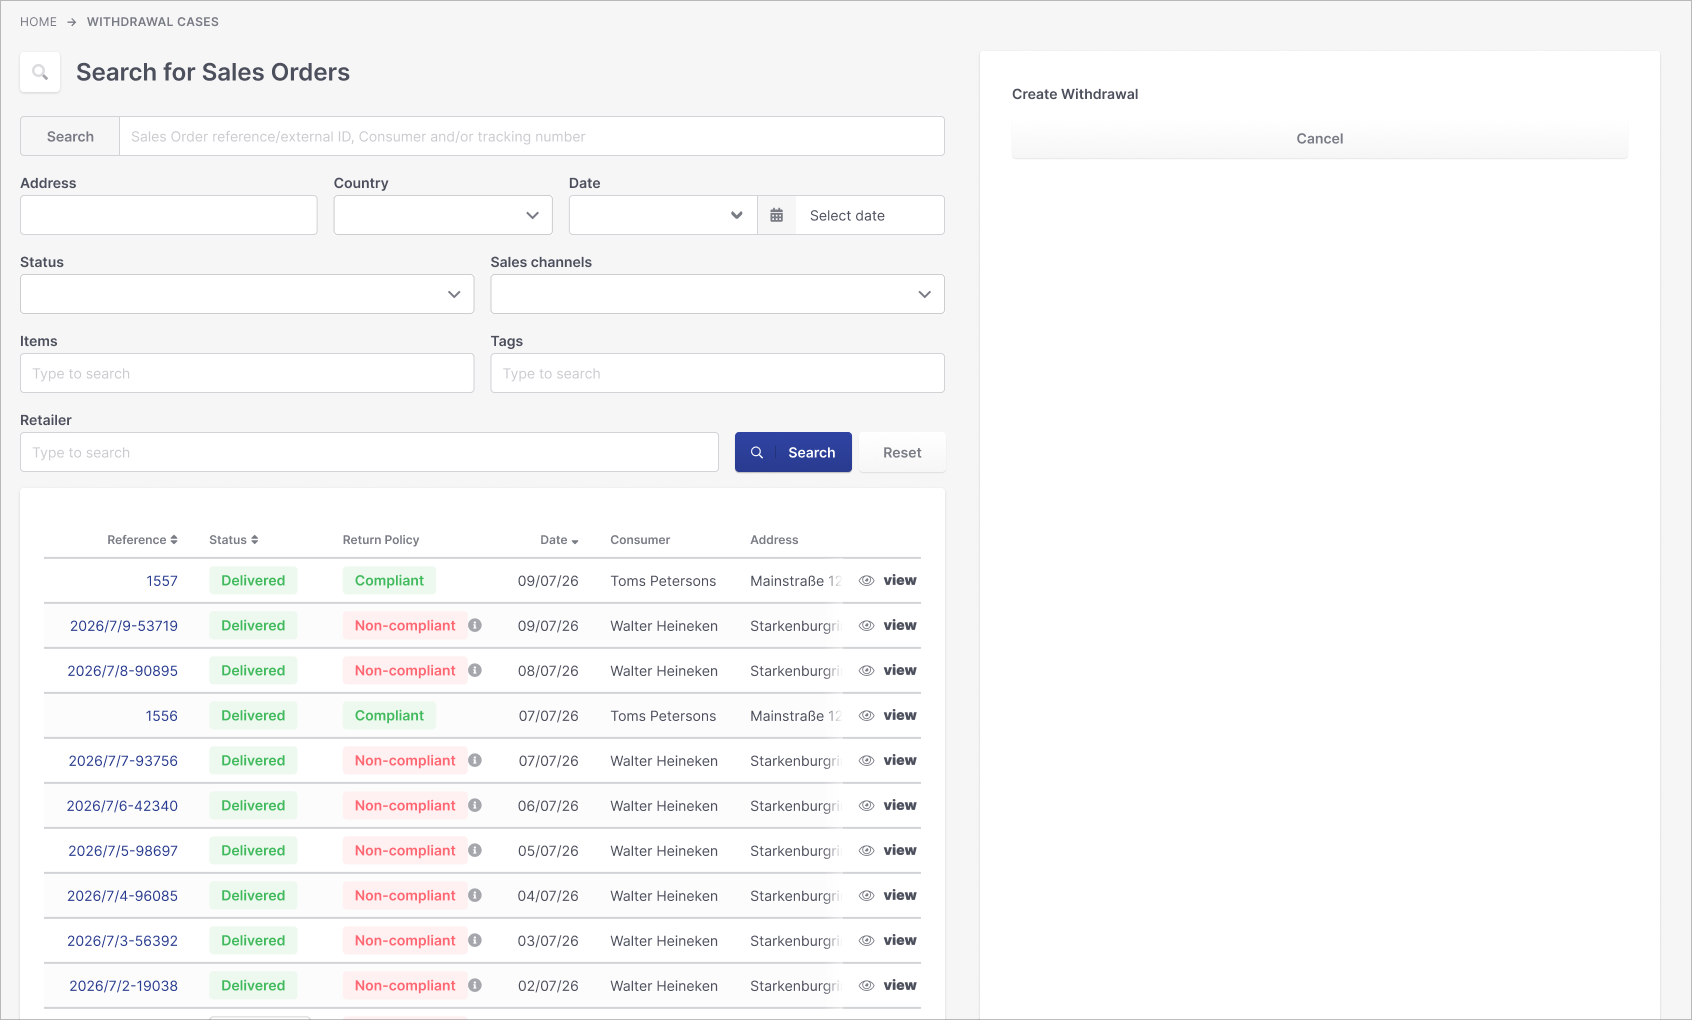
To keep all withdrawals in one documented process, your team can create a withdrawal case manually in the Management Portal, for example after a phone call. Enter the declaration data (name, reference, email, optional reason) and process the case like any widget case: assign it to the order, and the standard email communication and history apply.
From withdrawal case to withdrawal return
From an assigned case, create a withdrawal return: a return of type "Withdrawal". This is not a regular, voluntary return. The withdrawal return is a dedicated process that is governed by the statutory withdrawal, while using the same logistics infrastructure as your other post purchase processes: label creation, carrier handling, tracking and tracing, and the final credit note, which can also be issued automatically depending on your configuration.
The withdrawal case and the withdrawal return are linked in both directions: from the case you jump to the return, and the return shows that it originates from a statutory withdrawal. Your team therefore always sees unambiguously whether it is handling a withdrawal return or a voluntary return; the two never blur into a mixed process.
Next steps
- Self-Service Portal Handover
- Activity Log and Data Retention
- Reference: Configuration Parameters, Statuses and Rejection Reasons