
Sales Force
Salesforce
Overview
The Salesforce integration connects returns.cloud with Salesforce and allows return-related cases to be created and updated in Salesforce automatically.
When a relevant return is processed in returns.cloud, the integration can create a Salesforce Case. The Salesforce Case ID is then stored in returns.cloud so that the same case can be updated later instead of creating a duplicate.
This allows service teams working in Salesforce to handle return-related customer cases while returns.cloud remains the system that manages the return process, return orders, items, statuses, and related operational data.
The integration can be limited to selected Sales Channels. This means you can decide which channels should use Salesforce as the connected helpdesk system.
Prerequisites
Before the integration can be used, the following conditions must be met.
The Salesforce instance must be available and the required API credentials must be provided. These credentials are needed so that returns.cloud can connect to Salesforce and create or update cases.
The Salesforce user used for the connection must have permission to create and update Cases in Salesforce. If specific Salesforce fields should be filled by the integration, the user must also have access to these fields.
The Sales Channels that should use the Salesforce integration must already exist in returns.cloud. During the setup, you will select the Sales Channels for which Salesforce cases should be created or updated.
A Business Parameter must exist in returns.cloud to store the Salesforce Case ID. This is important because the integration uses this value to remember which Salesforce Case belongs to a return-related record.
If you want to send values to custom Salesforce fields, these fields must already exist in Salesforce before you configure them in returns.cloud.
Setup and Configuration
To set up the Salesforce integration, navigate to System Settings -> Integrations in returns.cloud and add a new integration of the type "Salesforce".
General & Connection
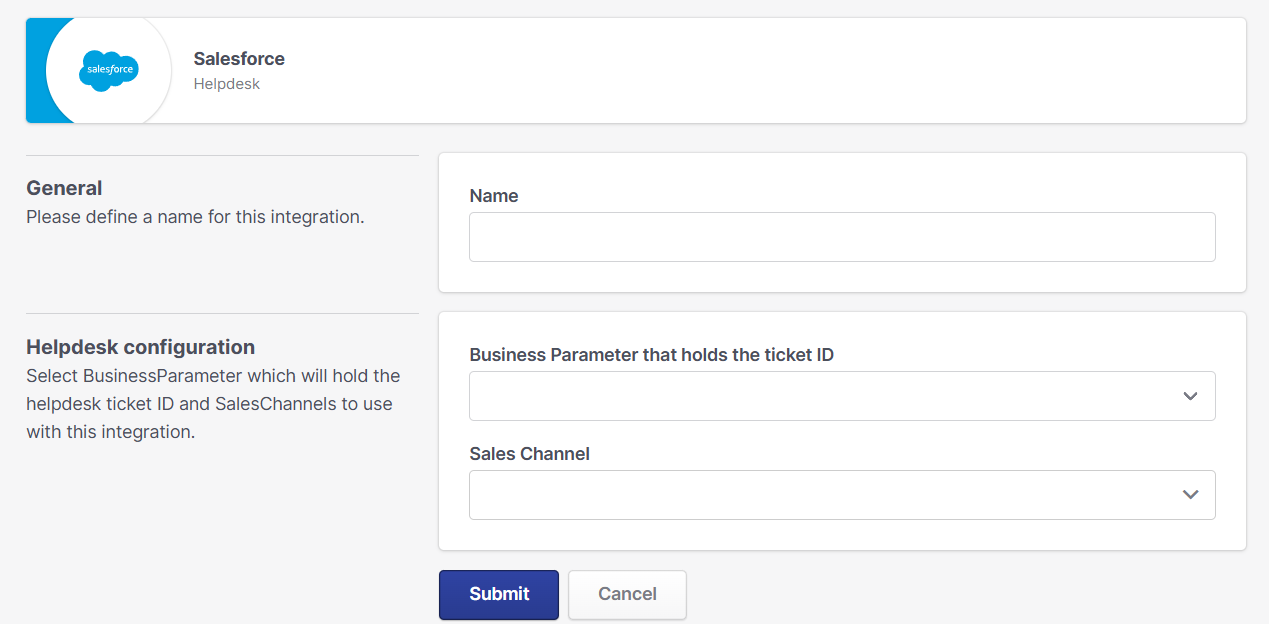
Step 1: General
Enter a descriptive name for the integration, for example "Salesforce".
This name is only used internally to identify the integration in your settings.
Step 2: Helpdesk configuration
In the Helpdesk configuration section, select the Business Parameter that should store the Salesforce Case ID.
This field is required. It allows returns.cloud to link a return-related record to the correct Salesforce Case. If the integration creates a new case, the Salesforce Case ID is saved in this Business Parameter. If the same return is updated later, the integration can use the stored Case ID to update the existing Salesforce Case.
Next, select the Sales Channels that should use this integration.
Only returns from the selected Sales Channels will be handled by this Salesforce integration. If a Sales Channel is not selected, the integration will not create or update Salesforce Cases for that channel.
After completing the General and Helpdesk configuration, click Submit to save the settings.
Actions
Step 3: API Connection Configuration
The API connection configuration contains the connection details required to connect returns.cloud with Salesforce.
Enter the Salesforce subdomain. This is the part of your Salesforce URL before ".my.salesforce.com".
Then enter the required API credentials, token, username, and password.
These values are usually provided by your Salesforce administrator or configured through a Salesforce connected app.
After entering the connection details, click Test.
A successful test confirms that returns.cloud can connect to Salesforce. If the test fails, check the Salesforce subdomain, credentials, token, username, password, and user permissions in Salesforce.
Step 4: Ticket Sync
The Ticket sync section defines when a Salesforce Case should be created or updated and what information should be sent to Salesforce.
Enable ticket sync to activate the synchronization.
The sync condition defines when the integration should create or update a Salesforce Case. This allows you to control which return-related events should be sent to Salesforce.
For example, you can configure the integration so that a Salesforce Case is created only when a return reaches a specific status, such as waiting for approval. (best approach to raise a ticket at [email protected] to get this defined)
The ticket subject defines the subject of the Salesforce Case. It can include return information such as the Return Order number or the requested action.
The ticket comment defines the initial comment or description that is added to the Salesforce Case. This can include information about the return, the customer, the return status, or the requested service action.
The following placeholders are available for the ticket subject and ticket comment:
{{ number }} - Return Order number
{{ salesOrderNumbers }} - Sales Order numbers, comma separated
{{ consumer.fullName }} - Consumer full name
{{ consumer.email }} - Consumer email address
You can also define whether the comment should be public and who will be the author. Default is the consumer of the return order.
If the public option is enabled, the comment is created as a public comment in Salesforce. If it is disabled, the comment is handled as internal or private, depending on the Salesforce configuration.
Step 5: Field Mapping
The Salesforce integration allows you to define which values should be sent to Salesforce fields.
There are two types of field mappings:
System fields & Custom fields
System fields are commonly used Salesforce Case fields, such as language, origin, reason, priority, or status.
Custom fields are company-specific Salesforce fields that were created in your Salesforce setup.
For each field, you define which value should be sent to Salesforce and when it should be sent.
The condition controls whether the field is sent when the case is created, when the case is updated, or in both situations.
Use Create for values that should only be set when the Salesforce Case is created.
Use Update for values that should only be changed when an existing Salesforce Case is updated.
Use Create and Update for values that should always stay synchronized between returns.cloud and Salesforce.
This makes it possible to keep Salesforce Cases aligned with the current return process in returns.cloud.
For example, the integration can set the Salesforce Case priority when the case is created and update the Salesforce Case status when the return is completed.
If your Salesforce Case object contains custom fields, you can fill them through the Custom fields section.
For each custom field, enter the Salesforce field ID and define which value should be sent.
Custom fields are useful when Salesforce should receive additional return-related information that is specific to your business process.
Before configuring a custom field in returns.cloud, make sure the field already exists in Salesforce and that the Salesforce user used for the integration has permission to access it.
Step 6: Expression Language Variables
The Expression language variables section can be used to define reusable mappings.
This is useful when values from returns.cloud need to be translated into Salesforce-specific values.
For example, a return action in returns.cloud can be mapped to a Salesforce case reason. A service order type can be mapped to a Salesforce category. A return locale can be mapped to a Salesforce language value.
These mappings help keep the data consistent between returns.cloud and Salesforce.
This step is optional. If your setup only uses fixed values or simple field mappings, you may not need to define additional variables.
Widget
Step 7: Widget Configuration
The Widget tab provides access details that can be used by a Salesforce widget or embedded component.
The widget allows Salesforce users to access relevant returns.cloud information from within the Salesforce context.
In the API access section, you can view or generate the credentials required by the widget.
The available values include:
- Domain
- Subdomain
- API key
- API secret
Use the Generate button to generate new widget credentials if needed.
In the Helpdesk widget section, select the Business Parameter that contains the Salesforce Case ID. This should be the same Business Parameter that is used in the general Helpdesk configuration.
How It Works
The integration checks whether a return-related record belongs to one of the selected Sales Channels.
If the record matches the configured sync condition, returns.cloud checks whether a Salesforce Case ID already exists in the selected Business Parameter.
If no Salesforce Case ID exists, the integration creates a new Salesforce Case and stores the returned Case ID in returns.cloud.
If a Salesforce Case ID already exists, the integration updates the existing Salesforce Case instead of creating a new one.
The ticket subject, ticket comment, system fields, and custom fields are sent according to the configuration.
This ensures that Salesforce users can work with up-to-date case information while the return process continues to be managed in returns.cloud.